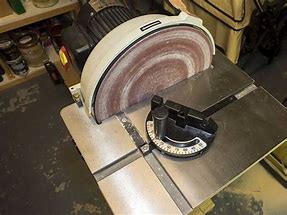
A disc sander may look like an easy, straightforward power tool to use. However, in reality, it’s not. It can be complicated, especially if you’re using it for the first time. However, as much as we try to overstate the difficulties of using disc sanders, it isn’t rocket science. What that means is anyone can learn how to use it effectively. In this article, we’re going to go over six steps to help you use your disc sander properly.
Step 1 – Wear Safety Gear
Before you start using a disc sander, you should wear your protective gloves and goggles. You should wear them every time you operate power tools such as disc sanders. The eye shields will protect you from any dust and dirt particles that may fly off and into your eyes, while the gloves will protect your hands from getting injured by the power tool itself. Moreover, avoid wearing loose clothing. You should also wear an apron for added protection. Finally, tuck in your hair if it’s long.
Step 2 – Set up Your Disc Sander
Place your disc sander in a place where less traffic is present. It reduces the risk of people and objects bumping into you while you’re using the machine. Make sure the protective shield that covers the circular sander is in place at all times. Check if the dust extraction unit is also connected. If not, attach it to the disc sander before turning it on.
Step 3 – Prepare All the Necessary Materials
Always make markings on the areas of the material you want to be sanded. Disc sanders can sand off various materials such as wood, plastics, and metal. The marks will help you determine the success of the shape your desire.
Step 4 – Turn Your Disc Sander On
Once the disc sander is all set, you can now proceed to turn it on. Let the disc reach full speed, which will require a few minutes of waiting. You will notice that the disc sander rotates in a counterclockwise direction, which means you need to use the left portion of the sander exclusively.
Step 5 – Using the Disc Sander
Always keep your fingers at the very least four inches away from the disc sander. Slowly and carefully place the material you want to sand on the table of the disc sander. Lightly and slowly push it against the fast-rotating disc. At the same time, move the piece from left to right at the same time. Avoid pressing the material too hard on the tool.
You are only allowed to use the part of the disc sander that it not protected by a guard. Finally, keep the material moving at all times. Not doing so will cause friction between the work and disc sander, which will cause the wood to blacken. Once you’ve achieved the desired shape, turn the sander off and slowly remove the material from the table.
Congratulations! You now know how to use a disc sander. For an advanced guide on using your disc sander effectively, visit our website today!